Any tape, regardless of format or age, can and will become dirty, collect dust, and even damage due to careless wear and tear or simple degradation caused by time. Many things can and will damage the quality of films if they’re taken care of. The maintenance needed for old tapes to preserve and restore them will help keep these old movies around for years to come. The guide below will describe how to clean and repair your old tapes in a manner that will help to keep them around for a while.
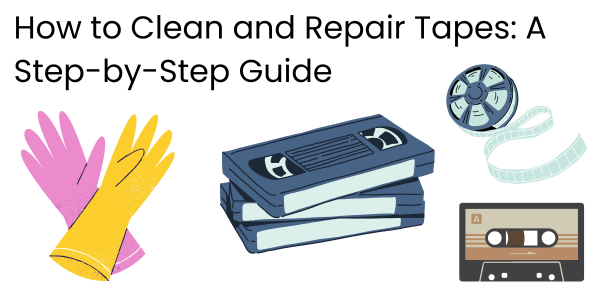
1. Cleaning VHS and Cassette Tapes
Tools You’ll Need:
- Cotton swabs
- Isopropyl alcohol (at least 90%)
- Soft, lint-free cloth
- Cleaning machine (optional for VHS tapes)
- Tape head cleaner (optional)
Steps for Cleaning VHS Tapes:
- Remove Dust and Dirt: The best way to begin is to inspect the tape to see whether it has any visible debris. that can cause damage if left alone. When removing said debris, you’ll want to utilize a soft cloth, preferably lint-free, to gently wipe away any particles of dust and/or dirt you find on the surface.
- Clean the Tape Heads: It’s not just the film you need to clean since the tape heads in your VCR can also accumulate dust and grime, affecting how your film will appear. You can clean the tape heads with a cotton swab after lightly moistening it with isopropyl alcohol. A gentle swipe along the tape heads with the swab is all you need to clean it; there’s no need to push too hard. It’s also possible to purchase a cleaning kit for the tape heads that will typically offer specially-made swabs and fluid that is designed specifically for cleaning the machine.
- Clean the Tape: If the tape is dirty, or if you think it is due to mold or other residue, you can clean it with a swab dipped in isopropyl. As with all parts of the tape and system, you’ll need to take care and not push too hard since too much alcohol can damage the magnetic coating.
- Use a Cleaning Machine (Optional): If you have access to a tape cleaning machine, it’s wise to use it regularly or when you feel it’s warranted. This machine uses rollers and special cleaning fluids to clean your tape and decrease friction during playback.
Steps for Cleaning Audio Cassettes:
- Wipe the Cassette Shell: Wipe the outer shell with a soft cloth to remove dust.
- Clean the Tape with a Cotton Swab: Using a cotton swab lightly moistened with isopropyl alcohol, gently wipe down the tape on each side to remove any dirt and/or mold.
- Dry the Tape: Once it’s been cleaned, allow the tape to dry to ensure no moisture remains.
2. Repairing Damaged Tapes
Cleaning does manage to remove any debris that might accumulate on your tape, but any physical damage will require a bit of added attention and care.
Tools You’ll Need:
- Scotch tape (preferably transparent, non-adhesive)
- Scissors
- Tape splicing kit (for film or professional audio tapes)
- Tightening tools (for loose or slack tapes)
Steps for Repairing Tapes:
- Fix Broken Tape: A physically broken tape will need repairing with clear, non-adhesive scotch tape. Line up each end of the tape and use a small amount of clear tape to secure them. You want to keep this splice as flat as possible to avoid any interruption in playback. Regular adhesive tape won’t cut it, as it could cause a buildup of residue on the tape.
- Rewinding and Tightening the Tape: For tape that has gone slack or come loose, it’s necessary to wind the tape back gently so as not to damage it. You can turn the reels with your hand or use a cassette player to accomplish this task with the fast forward/rewind functions.
- Use a Professional Splicing Kit (For Film or Audio Tapes): Specialized kits are available for tapes that require advanced techniques, including reconnecting broken pieces or splicing.
- Reassemble the Cassette or Reel: After the tape has been repaired, it must be reassembled slowly and carefully. Take care to make sure that the tape is lined up on the spools and doesn’t twist or tangle while it’s being reeled in.
- Test the Tape: Following the previous processes, you can test the tape by putting it through a projector or tape player to ensure smooth playback. Be sure to pay attention to any unwanted distortion, skipping, or other damage.
3. Repairing 8-Track Tapes
When cleaning 8-track tapes, it’s important to note that the repair and cleaning process will be a little more involved, thanks to the tape’s overall structure. One technique is to iron the tape and clean the mechanisms, but it’s a little tricky for beginners.
You can take a look at this video on 8-track tape repair. It showcases experts from The 8 Track Tape Store as they walk through how to maintain these tapes to ensure proper playback. This is a more hands-on method that helps improve the overall condition of your tape while at the same time extending the lifespan of your 8-track tapes.
4. Preventive Measures
- Proper Storage: You can avoid damaging your tapes by keeping them in a dry, cool place away from humidity and direct sunlight. Also, using acid-free containers will help protect your tapes from environmental damage.
- Regular Maintenance: It is necessary to clean your tapes and players from time to time. This helps to avoid any buildup of dust or grime that can affect the operation of your equipment.
Conclusion
Old tapes require plenty of cleaning and repair to ensure they work correctly and are preserved for years. This applies to VHS tapes, audio cassettes, film reels, 8-track tapes, and any other film one might enjoy. The time and care one puts into maintaining old tapes will prevent any unwanted deterioration and keep them in good shape for many years. If you feel the need, you can enlist the help of professionals who know what they’re doing. Or, you can learn on your own and save a little.
Personal Experience: The Importance of Cleaning and Repairing Tapes
I can tell you from experience that tape maintenance is a very technical process, but it’s also an emotional one. It was a rough process when I started converting my old tapes of special events and family trips. Most of the tapes were old, with plenty of signs of wear and tear. When I first started, I had no idea what kind of damage could occur just by putting the tapes in their respective players.
Learning how to dust tape heads or treat the film was rough. I didn’t know as much about fuzzy images or skipped frames that could happen during the conversion process. After I learned how to clean and repair the right way, improvement in my tapes was easy to notice during the conversion to digital. Not only that, but I was able to restore some of my tapes that had suffered breaking damage due to the tips on splicing. This was a highly rewarding process since it helped me to preserve some of my most precious memories.
It was also a challenge to repair the 8-track tapes that were an inheritance from my grandparents. After a bit of practice and a few YouTube tutorials, I learned how to repair them utilizing the ironing technique that was shared in the 8-Track Tape Repair: Ironing & Cleaning Tape video. Hearing those old tapes was a joy after so many years.
Preserving old tapes is time-consuming but also highly satisfying. With enough care and patience, you can keep your old media from degrading and possibly share it in digital format with your loved ones for generations.